Field Navigation
Gate of Guidance • Mausoleum of the Giants • Temple of the Sun • Spring in the Sky • Inferno Cavern • Chamber of Extinction • Twin Labyrinths • Endless Corridor • Shrine of the Mother

Mausoleum of the Giants
Behold the Mausoleum of the Giants.
The sad memories of the Giants are contained within.

— Grail Tablet,
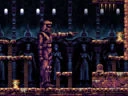
Mausoleum of the Giants (E-3)
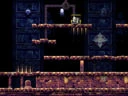
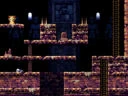
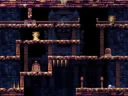
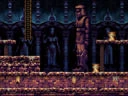
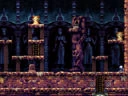
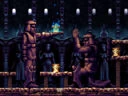
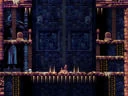
The Mausoleum of the Giants (Japanese: 巨人霊廟, "Kyojin Reibyō" / lit. "Giant Mausoleum") is an early section of the ruins chronicling the sad history of the Giants through statues, murals, and tablets. Reading the tablets scattered around the field will reveal the names of the Giants, which is required for solving most of the puzzles here.
- Area number: 2
- Music: Grand History
- Entrances and Exits:
- B-1: Gate of Guidance (A-6)
- B-5: Endless Corridor (D-1)
- H-4: Twin Labyrinths (A-2)
- D-3: Graveyard of the Giants (C-3) - After defeating Sakit
- Requires Bronze Mirror
- Grail Tablet: (E-3)
- Backside Door: (D-3)
- Compass: (C-2)
- Guardian:
- Sakit: (C-5)
- Sub-Bosses:
- Ghost Lord: (A-2)
Map[]
| A | B | C | D | E | F | G | H | |
| 1 |  |
 |
 |
|||||
| 2 |  |
 |
 |
 |
||||
| 3 | 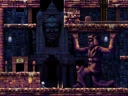 |
 |
 |
 |
||||
| 4 | 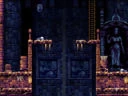 |
 |
 |
| ||||
| 5 | 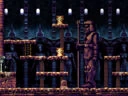 |
 |
 |
 |
||||
| 6 | 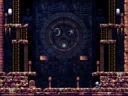 |
Items[]
Weapons[]
- Location: (A-2)
- Place a weight on the dais at (B-2) to move the wall, then fall through the floor to the right to access (A-2) to the left. Attack the Ghost enemies until the Ghost Lord sub-boss appears. Defeat it to reveal the Rolling Shuriken.
Treasures[]
- Location: (F-3)
- Buy in the shop for 60 coins.
- Location: (C-2)
- Depress the floor switch on the suspended platform, then place a weight on the dais at (C-1) to unlock the chest. Note: Placing a weight on the dais before stepping on the switch will cause the spikes above to fall and damage you.
- Location: (F-4)
- Place a weight at the foot of the rightmost Giant statue to unlock the chest. Note that placing a weight at the foot of any other Giant will trigger a spike trap. (The dais isn't visible but its a to the right, roughly past the toes.)
Ankh Jewel[]
- Location: (G-3)
- Enter (G-3) from the left and place a weight on the dais to reveal the Ankh Jewel. At (E-6), jump on either floating platform to rotate the Nebra Sky Disk until the Star symbol is on top. This will cause the Giant at (G-4) to collapse upon entering the room (you can be crushed to death!), granting access to the ladder. Climb up to (G-3) and break the head statue on the right side of the center block before collecting the Ankh Jewel, or a barrier will trap you inside when you grab it, forcing you to warp out with the Holy Grail.
Puzzles[]
Nebra Sky Disk[]
- Location: (E-6)
- The Nebra Sky Disk activates three puzzles in the field in accordance with the history of the Giants. Whichever symbol is on top will change something elsewhere in the field
- Star on top: in (G-4), the statue of Bado will collapse (this is fatal if caught underneath) and provide access to the Ankh Jewel in (G-3)
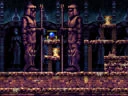
- Sun on top: in (H-4), a hole will open in the chest of the statue of Ledo. It reveals a dais that reveals Sakit's Ankh in (C-5)
- Moon on top: in (C-5), the statue of Ji will kneel in prayer (this movement can also crush you if you run into the room too quickly), providing access to Sakit's Ankh
Sakit's Ankh[]
- Location: (C-5)
- Jump on the floating platforms at (E-6) to rotate the Nebra Sky Disk until the Sun symbol on top to reveal a dais at (H-4) on the Giant's chest. Place a weight here to reveal the Ankh. Use the mechanism at (E-6) to set the Moon symbol on top, causing the right giant at (C-5) to kneel, thus creating a platform allowing you to reach the Ankh.
Weigh In[]
- Location: (D-3)
- There is a scale in the upper-left corner of the room which can be used to weigh Lemeza (numerals will be displayed in La-Mulanese), which is necessary to solve the Room of Gems and Scales puzzle in the Tower of the Goddess. The platform can be reached by dropping through the floor in (D-2) and using either the Grapple Claw or Feather.
Prove Thou Art Small[]
- Location: Any room with a Giant.
- After obtaining the Mini Doll from the Gate of Illusion, equip and use it in any room with a Giant statue to prove you are small. The Shell Horn will play as confirmation.
Do the Mario![]
- Location: (D-5)
- Required for the Flooding the Tower of the Goddess puzzle. Stand on top of the rightmost pot and press Down to teleport to a sealed-off section of the Spring in the Sky.
Traps[]
- Location: (D-1)
- The first time you read the tablet in the top right corner, it warns you not to do it again. Read it again anyway, and extra enemies will spawn throughout the entire Ruins! In other words, this activates 'Hard Mode.' Moreover, the effect is permanent; it can only be reverted through loading a prior save.
- Location: (D-2)
- There is a trapdoor on the center walkway just to the left of the tablet. A large area on the bottom walkway will disappear when stepped on, dropping you below to (D-3), potentially onto a bed of spikes.
- Location: (E-3)
- When riding the elevator between (E-3) and (E-5), you can be hit by the spikes from above if you ride all the way to the top. Avoid this by standing on the right edge of the elevator or jumping off before it reaches the top.
- Location: (G-4)
- Setting the Nebra Sky Disk to the Star symbol will cause the Giant at (G-4) to collapse, which is necessary to obtain the Ankh Jewel. Standing under the Giant will cause you to be crushed to death.
- Location: Any room with a Giant statue
- As part of the process of obtaining the Sacred Orb, it is possible to place weights at the Giants' feet. Placing a weight at the foot of any Giant except the correct one will trigger a spike trap.
NPCs[]
Priest Xanado[]
- Location: (D-1)
- Gives a hint about the Nebra Sky Disk at (E-6).
Shops[]
Greedy Charlie[]
- Location: (F-3) - Break the lower pot to reveal the entrance.
- Hermes' Boots - 60 Coins
- Rolling Shuriken Ammo - 10 for 10 Coins
- Weights - 5 for 10 Coins
Coin Chests[]
- Location: (C-1)
- Break the wall to reveal the chest. Shuriken work well.